logo
logo
  • Homepage
  • Recipes
    • Asian Cuisines
    • North American Cuisines
  • Dining
    • Dining Basics
    • Dining Furniture
  • Kitchen
    • Kitchen Appliances
    • Kitchen Essentials
    • Kitchen Gadgets
    • Kitchen Storage
    • Grilling
  • Consumables
    • Drinks
  • Kitchen Institute
  • Kitchen

4 Ikea Kitchen Hacks We’re Loving This Summer (All Under $30)
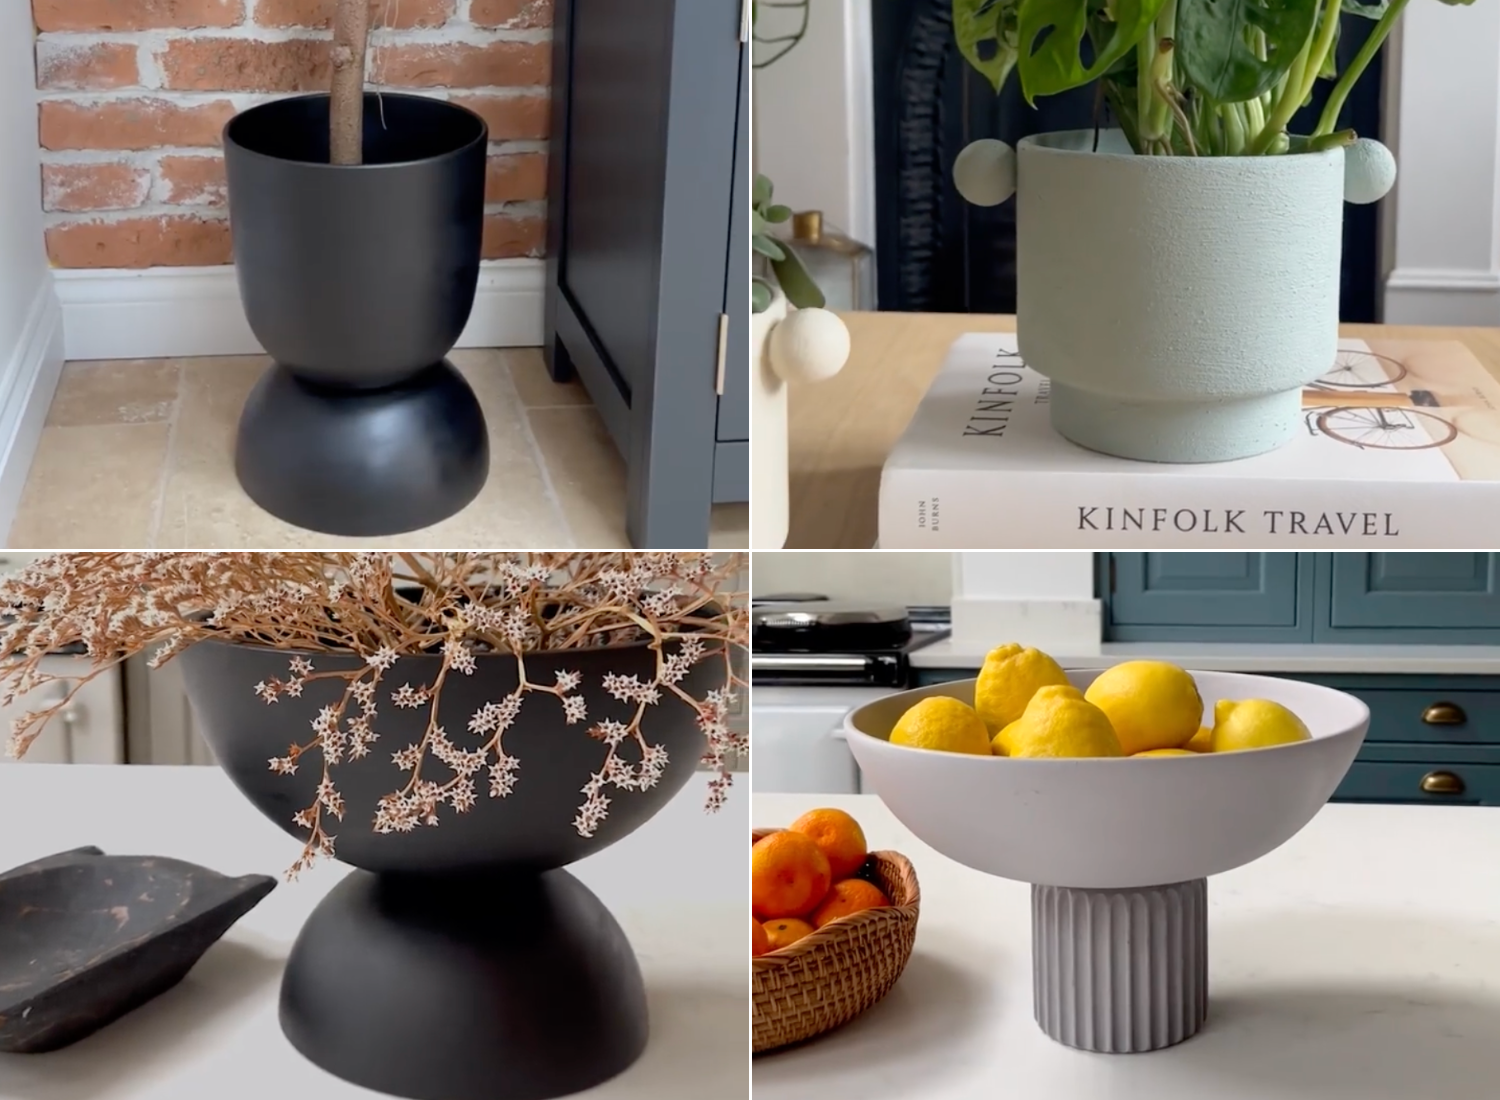
Micki Bleha
Written By Micki Bleha
Original Publish Date: Jul 12, 2024, 04:08 PM
Last updated: Aug 30, 2024, 08:13 PM
Disclosure ↓
ikea kitchen hacks
View all Contents
  • Oyoy Living Planter
    • Materials You’ll Need
    • How to Make It
  • Hourglass Floor Planter
    • Materials You’ll Need
    • How to Make It
  • DIY Hourglass Dining Table Centerpiece
    • Materials You’ll Need
    • How to Make It
  • DIY Ceramic Fruit Bowl
    • Materials You’ll Need
    • How to Make It

There’s something incredibly satisfying about transforming ordinary items into beautiful, functional pieces for your home. As someone who loves both creativity and a good bargain, I’ve always been drawn to DIY projects that make a big impact without breaking the bank. Lately, I’ve been obsessed with finding ways to incorporate stylish decor into my kitchen, all while keeping the budget under $30. It’s amazing what a little bit of imagination and some affordable Ikea kitchen hacks can accomplish.

I know many of you, like me, enjoy adding personal touches to your living spaces, especially when it involves a fun, hands-on project. Whether you’re a seasoned DIY enthusiast or just looking for a new hobby, these Ikea hacks are not only easy to execute but also incredibly rewarding. With just a few simple materials and a bit of creativity, you can elevate your kitchen decor in no time.

Oyoy Living Planter

I’ve been seeing these cute Oyoy Living planters all over the internet, but those little beauties never justified the cost, so I made them myself with a couple of Ikea FÖRENLIG plant pots. You’ll have a few sizes to choose from on the website. You can choose whichever size you prefer for your kitchen. For mine, I picked the biggest one in white, which is 9.5 inches and cost $13.


View this post on Instagram


A post shared by Jen Rothbury (@crack_the_shutters)

Materials You’ll Need

  • Ikea FÖRENLIG plant pot (size of your choice)
  • Two 1-inch or 1.5-inch wooden balls
  • Sandpaper
  • Strong adhesive glue
  • Spray paint (color of your choice)
  • Acrylic paint
  • Baking soda (optional, for texture)
  • Medium-sized flat paintbrush

How to Make It

Attach the Wooden Balls

  1. Sand down one side of each wooden ball to create a flat surface. This will make it easier to attach them to the plant pot.
  2. Apply a strong adhesive glue to the flat side of each wooden ball.
  3. Stick the balls to the sides of the plant pot, positioning them as cute little handles. Let the glue dry completely.

Paint the Planter

  1. Take the planters outside or to a well-ventilated area for painting.
  2. For a simple, sleek look, spray-paint the entire planter in your chosen color. Let it dry completely.
  3. For a textured effect, mix a small amount of baking soda with acrylic paint until you achieve a thick, textured consistency.
  4. Use a medium-sized flat paintbrush to apply the textured paint to the planter. Cover the entire outside surface.
  5. Once the outside is dry, paint the inside of the planter for a more uniform look.

Hourglass Floor Planter

I’m a huge fan of different shapes and curves when it comes to interior design, and I’ve been seeing these hourglass floor planters that start from $70 and can go all the way up to $300 depending on the brand and the size you prefer. Well, I found an easy way to hack this design for under $30.


View this post on Instagram


A post shared by Jen Rothbury (@crack_the_shutters)

Materials You’ll Need

  • Planter with a rounded bottom (11-inch diameter preferred)
  • Ikea Blanda Matt serving bowl (11-inch diameter)
  • Sandpaper
  • Oil-based black paint
  • Paintbrush
  • Strong adhesive glue
  • Cardboard or newspaper (for lining your work surface)

How to Make It

First, sand down the bottom of the Ikea Blanda Matt serving bowl slightly to ensure better adhesion.

Paint the Planter and Bowl

  1. Line your work surface with cardboard or newspaper to protect it from paint.
  2. Use an oil-based black paint to cover both the planter and the serving bowl completely.
  3. Allow the paint to dry fully before proceeding to the next step.

Assemble the Hourglass Planter

  1. Turn the planter upside down and apply a strong adhesive glue to its bottom.
  2. Carefully place the serving bowl on top of the glued bottom of the planter, keeping it is centered and secure.
  3. Let the glue dry completely to ensure a sturdy bond.

Once the glue has dried, your stylish hourglass floor planter is ready to enhance your interior design! This budget-friendly hack not only saves money but also adds a unique, modern touch to your home decor.


DIY Hourglass Dining Table Centerpiece

Can you tell I love hourglass-shaped decor? After creating the planter, I thought, why stop there? I have a huge dining table that was in dire need of a centerpiece, so I decided to make one myself using two Ikea Blanda Matt wooden serving bowls. The key here is to choose one bowl smaller than the other. I picked one in 11 inches and one in 8 inches.


View this post on Instagram


A post shared by Jen Rothbury (@crack_the_shutters)

Materials You’ll Need

  • Ikea Blanda Matt wooden serving bowls (one 11-inch and one 8-inch)
  • Sandpaper
  • All-surface matte black paint
  • Paintbrush
  • Strong adhesive glue
  • Dry flowers (optional for decoration)

How to Make It

Prepare the Serving Bowls

  1. Sand down the bottoms of both bowls to ensure better adhesion.
  2. Using the all-surface matte black paint, cover both bowls completely.
  3. Allow the paint to dry fully before proceeding to the next step.

Assemble the Centerpiece

  1. Apply a strong adhesive glue to the bottom of the smaller bowl.
  2. Carefully stick the smaller bowl to the bottom of the larger bowl, ensuring they are centered and secure.
  3. Let the glue dry completely to ensure a sturdy bond.
  4. Add some dry flowers or other decorative items to the centerpiece for an added touch of elegance.

This DIY hourglass centerpiece adds a sophisticated and unique touch to your dining table, making it a stunning focal point for your home decor.

DIY Ceramic Fruit Bowl

For our last hack, let’s move away from the wooden bowls and play with ceramics. I have a wide bowl from Ikea with a basic design that I wanted to make more decorative. I took a small planter that fit the base of the bowl. I picked out a planter with a serrated surface to add some texture and visual appeal to the bowl.


View this post on Instagram


A post shared by Jen Rothbury (@crack_the_shutters)

Materials You’ll Need

  • Wide ceramic bowl from Ikea
  • Small planter with a serrated surface
  • Spray paint with a concrete effect
  • Strong adhesive glue
  • Cardboard or newspaper (for lining your work surface)
  • Fruits for display (optional)

How to Make It

Prepare the Bowl and Planter

  1. Make sure both the bowl and the planter are clean and dry.
  2. Take both pieces outside or to a well-ventilated area and line your work surface with cardboard or newspaper.
  3. Spray paint the bowl and the planter with the concrete effect paint. Ensure even coverage and let them dry completely.

Assemble the Fruit Bowl

  1. Apply a strong adhesive glue to the bottom of the planter.
  2. Stick the planter to the bottom of the bowl, ensuring it is centered and secure.
  3. Let the glue dry completely to ensure a sturdy bond.
  4. Fill your new decorative bowl with whichever fruits your heart desires. I chose lemons because their color really pops against the matte concrete.

This DIY ceramic fruit bowl adds a touch of sophistication and modern elegance to your kitchen, making it a practical and stylish addition to your home decor.

Our Recipe for Trust: Why Choose Kitchen Institute

At the Kitchen Institute, we're dedicated to providing reliable and accurate information on cooking trends, tips, and product reviews. Our team of passionate food enthusiasts ensures that every piece of content is thoroughly researched and based on real-world experience. We pride ourselves on our comprehensive and unbiased product reviews, rigorous research processes, and commitment to staying current with the latest culinary innovations. Trust us to enhance your culinary journey with quality insights and practical advice.

Contributors

Micki Bleha
Micki Bleha
Kitchen Decor
Related Reads
  • 10 Ways To Create an Aesthetic Kitchen on a Budget (And 10 Mistakes To Avoid)
  • Trendy Kitchen Sink Ideas to Consider for Your Next Remodel
  • 5 Pantry Organization Hacks for a Clutter-Free Kitchen
  • Gorgeous and Functional Kitchen Decor Ideas That Save Space
Back to top
logo

©2025. All Rights Reserved

  • About Us
  • FAQ
  • Contact Us
  • Privacy
  • Terms
  • Sitemap
Contact

hello@kitcheninstitute.org

We independently research, test, review, and recommend the best products. If you buy something through our links, we may earn a commission at no cost to you. Click here to learn more about our process.