How to Pasteurize Eggs at Home (The Easy Way)
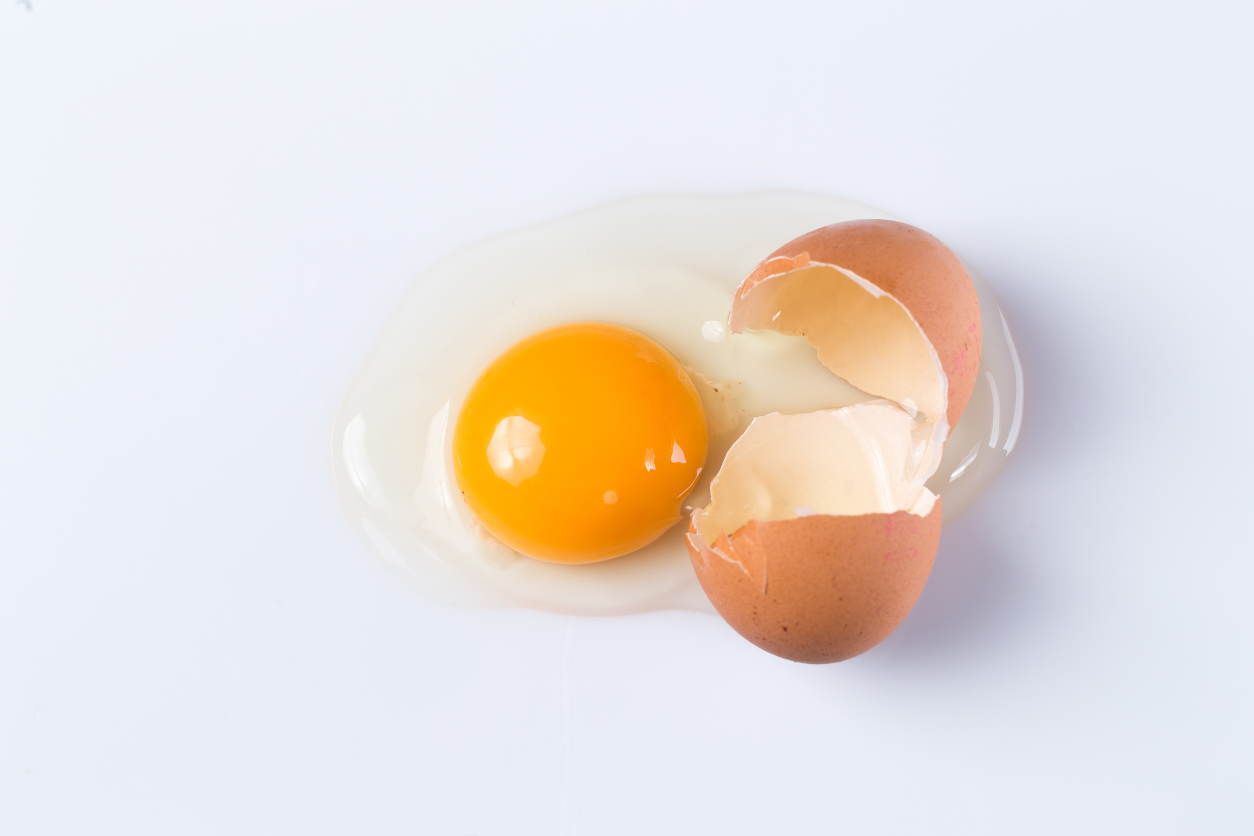
We all love eggs, whether they’re scrambled, sunny-side-up, or added to a delicious omelet. But when it comes to recipes that require raw eggs—like homemade mayonnaise, Caesar dressing, or cookie dough—many of us hesitate. The concern about foodborne illness, especially from bacteria like salmonella, is real. That’s where pasteurizing eggs comes in. Pasteurized eggs are heated just enough to kill bacteria like salmonella, but not enough to cook them.
You’ve probably seen them in grocery stores, but they can be pricey and hard to find. However, you can pasteurize them at home and it doesn’t take much effort. If you love making dishes that call for raw eggs, knowing how to pasteurize them yourself is a game-changer. It’s easy, requires no special equipment, and once you do it, you’ll wonder why you didn’t start sooner.
Why Pasteurize Eggs?
We use raw eggs in so many recipes, but they come with a small risk. Salmonella can lurk inside even clean, uncracked eggs, and if you’re making something where the eggs don’t get fully cooked—like hollandaise or tiramisu—that risk doesn’t just disappear. Pasteurizing eliminates that concern without changing the texture or taste.
There’s also the shelf-life benefit. Regular eggs last about three to five weeks in the fridge, but pasteurizing them can extend that a bit since bacteria is minimized. And if you have kids, elderly family members, or someone with a weakened immune system in the house, using pasteurized eggs is just an extra layer of precaution that’s worth taking.
What You Need to Get Started
The beauty of pasteurizing eggs at home is that you don’t need fancy tools. Just a few basics from your kitchen will do the trick:
- Fresh eggs
- A large pot
- A thermometer (digital is best for accuracy)
- A slotted spoon
- A bowl of ice water
That’s it. No sous-vide machine, no special gadgets—just a simple process that works.
Step-by-Step Guide to Get Pasteurized Eggs
Here are the simple steps to follow to pasteurize raw eggs:
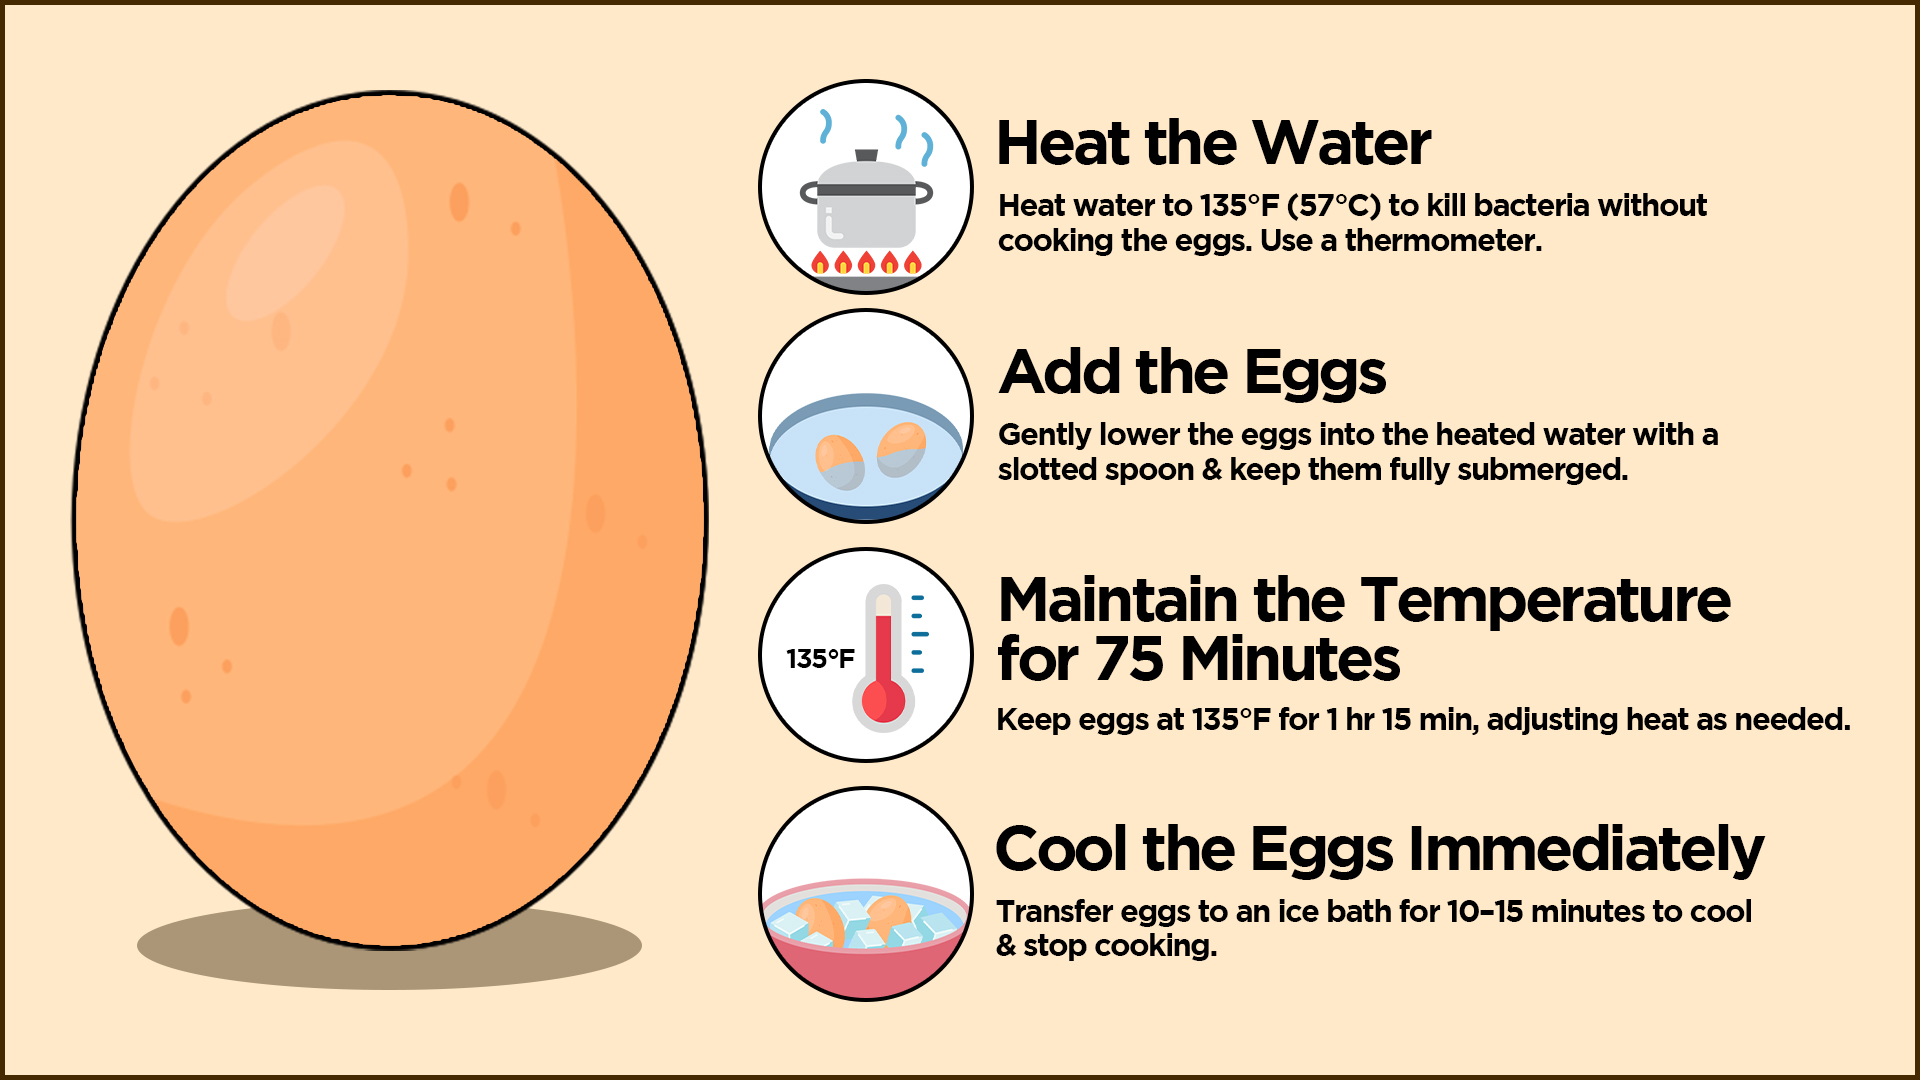
1. Heat the Water
Fill a pot with enough water to fully submerge the eggs. Set it on the stove and gradually heat it to 135°F (57°C). This is where precision matters. If the water is too cool, bacteria won’t be eliminated. Too hot, and you’ll start cooking the eggs. A good thermometer is key here.
2. Add the Eggs
Once the water reaches the right temperature, gently lower the eggs in with a slotted spoon. You don’t want them cracking before they even get pasteurized. Let them sit in the water, fully submerged.
3. Maintain the Temperature for 75 Minutes
Here’s where you need to keep an eye on things. The eggs should stay in the water for one hour and 15 minutes, with the temperature staying as close to 135°F as possible. If it starts creeping up, take the pot off the heat for a moment. If it drops, turn up the heat slightly. Stirring the water now and then helps keep the temperature even.
4. Cool the Eggs Immediately
When the time’s up, transfer the eggs into an ice bath. Let them sit for about 10 to 15 minutes to cool down completely. This stops the heating process and prevents them from cooking any further.
5. Dry and Store
Once cooled, pat them dry and pop them back in the fridge. It’s a good idea to mark them with a small “P” using a food-safe marker or wax pencil so you don’t mix them up with regular eggs. They’ll keep just as long as unpasteurized eggs, but now they’re safer to use in raw or lightly cooked dishes.
How to Tell If Your Eggs Are Pasteurized
After pasteurizing your eggs, if you’re still wondering whether you got it right, there’s a simple way to check. Crack one open next to a fresh, unpasteurized egg. The pasteurized one will have a slightly cloudy egg white, while the raw one stays clear. That’s your visual cue that the process worked.
Another way to double-check is with a thermometer. If you have an instant-read model, insert it into the thickest part of the egg (without touching the shell). A properly pasteurized egg should have an internal temperature between 130–135°F.
Pasteurized Eggs vs. Raw Eggs: What’s the Difference?
Aside from safety, pasteurization doesn’t change much. The eggs still cook, whip, and emulsify just like raw eggs. The only noticeable difference is the slightly opaque egg white, but in recipes, you won’t even notice.
Common Mistakes to Avoid
Even though this process is simple, there are a few common mistakes that can throw things off.
- Letting the water get too hot – If the temperature creeps above 140°F, you’ll end up with partially cooked eggs. Keep a close watch.
- Not keeping the water warm enough – If the temperature falls below 135°F, bacteria might survive, making the whole process ineffective.
- Skipping the ice bath – Cooling the eggs quickly stops residual heat from cooking them further. If you skip this step, you might end up with firmer yolks than you want.
- Forgetting to label them – Once pasteurized, they look just like regular eggs. Marking them ensures you don’t waste time guessing.
How Long Do Pasteurized Eggs Last?
Pasteurized eggs last about as long as unpasteurized ones—three to five weeks in the fridge. Since the process reduces bacteria, they might even last a little longer, but it’s still best to follow standard storage guidelines.
You can also freeze them if you want to keep them longer. Just crack them into a container, whisk lightly, and freeze. They’ll be fine for baking, though they won’t work as well for recipes that need raw eggs since freezing changes the texture a bit.
Our Recipe for Trust: Why Choose Kitchen Institute
At the Kitchen Institute, we're dedicated to providing reliable and accurate information on cooking trends, tips, and product reviews. Our team of passionate food enthusiasts ensures that every piece of content is thoroughly researched and based on real-world experience. We pride ourselves on our comprehensive and unbiased product reviews, rigorous research processes, and commitment to staying current with the latest culinary innovations. Trust us to enhance your culinary journey with quality insights and practical advice.